A Complete Beginner’s Guide to Fresh Milled Grains
Fresh milled flour has a way of changing the rhythm of a kitchen. The scent of the warm grain, the texture of living dough, the deeper flavor of everyday bread—once you experience it, it’s hard to see flour the same way again.
Milling your own grains is one of the most nourishing, practical skills you can add to a from-scratch kitchen. It doesn’t require perfection, special training, or a homestead. Just whole grains, a mill, and a willingness to learn as you go.
This guide brings everything together in one place:
Why fresh milled flour is worth the switch
A grain-by-grain beginner guide
How to get started milling at home
Soaking and sprouting grains
How to use fresh milled grains every day
What Is Fresh Milled Flour?
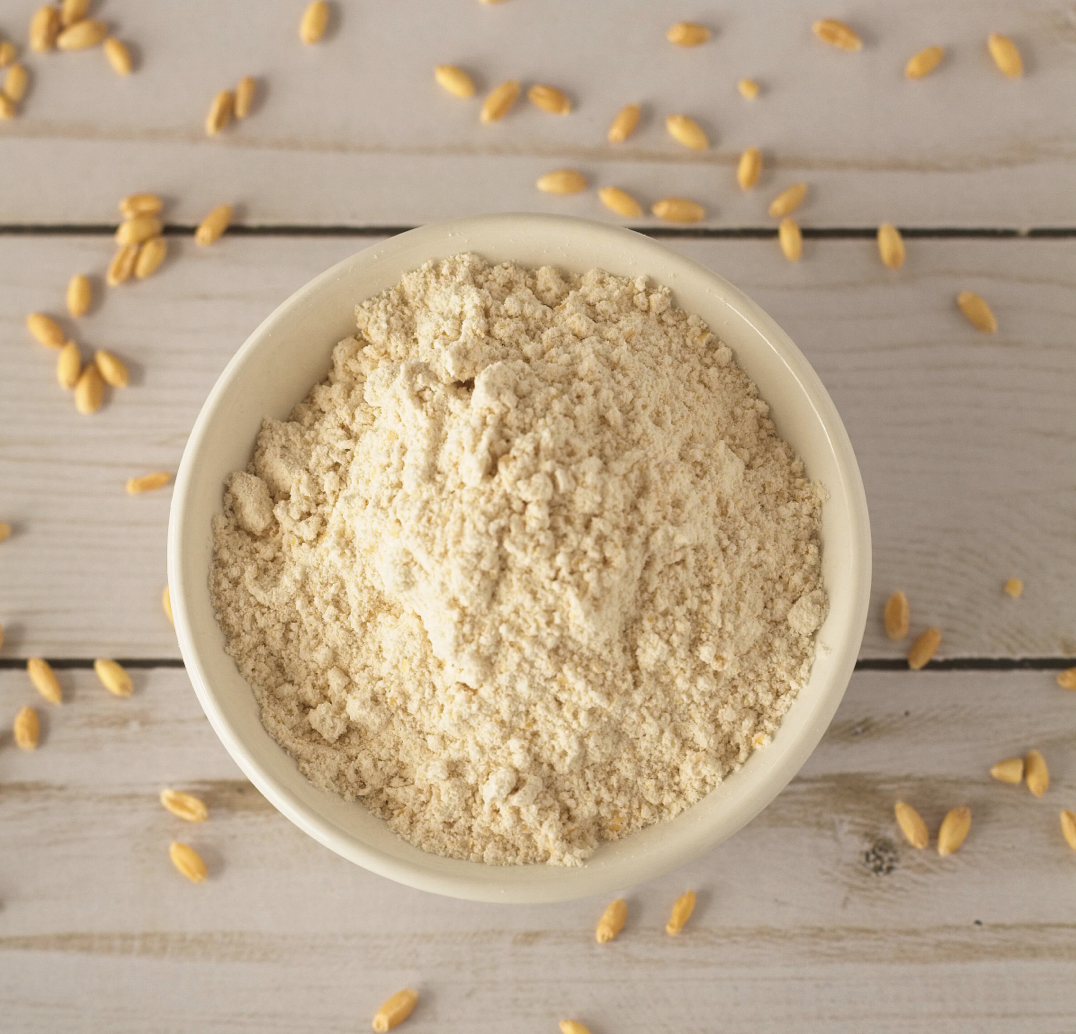
Fresh milled flour is flour made by grinding whole grain berries, such as wheat, spelt, einkorn, or rye, just before baking. When you mill your own flour at home, you reap the benefits of using the entire grain: the bran, germ, and endosperm.
Most commercial flour is milled weeks or months before purchase. To extend shelf life, the nutrient-dense germ is often removed, along with some of the bran. Fresh milling keeps the grain intact, vibrant, and nutritionally complete.
The Benefits of Fresh Milled Flour
1. Greater Nutrition
Whole grains begin losing nutrients as soon as they’re milled. Fresh milled flour retains B vitamins, vitamin E, iron, magnesium, and zinc, as well as natural fiber and fat. For families who bake bread regularly, this can make a meaningful difference.
2. Better Flavor
Fresh milled flour has a warm, nutty, slightly sweet flavor. The grain itself contributes depth and richness.
3. Improved Digestibility for Many People
Fresh flour, especially when paired with soaking, sprouting, or sourdough fermentation, can feel gentler on digestion for some people. While not gluten-free, it’s often better tolerated than highly processed flour. Many people who are unable to eat breads and baked goods made with commercial flour often find that they are able to eat products made using freshly milled flour.
4. A Deeper Connection to Food
Milling flour reconnects us to the most basic kitchen rhythm: grain → flour → bread. It slows baking down in a grounding way and turns everyday meals into something intentional and nourishing.
Getting Started Milling Your Own Flour
You don’t need a complicated setup to start milling your own flour. All you need is a mill and a bag of grain.
Choosing the right grain mill makes milling at home easier and more enjoyable. At a basic level, mills are either manual or electric.
Manual Mills
Manual mills rely on hand power. They’re budget-friendly, quiet, and perfect if you enjoy a slower, low-tech process. They’re great for occasional baking or as a backup. My very first mill is a manual hand crank wheel. It is very easy to use and was an inexpensive way to start. We have a large family and make everything from scratch, so I quickly outgrew the hand crank mill and needed to upgrade to an electric wheel to speed up the process and save the strain on my elbows. I still have my hand crank mill to use if we are ever without electricity or I I want to mill really oily grains or seeds that I am unable to process in my electric mill.
Electric Mills
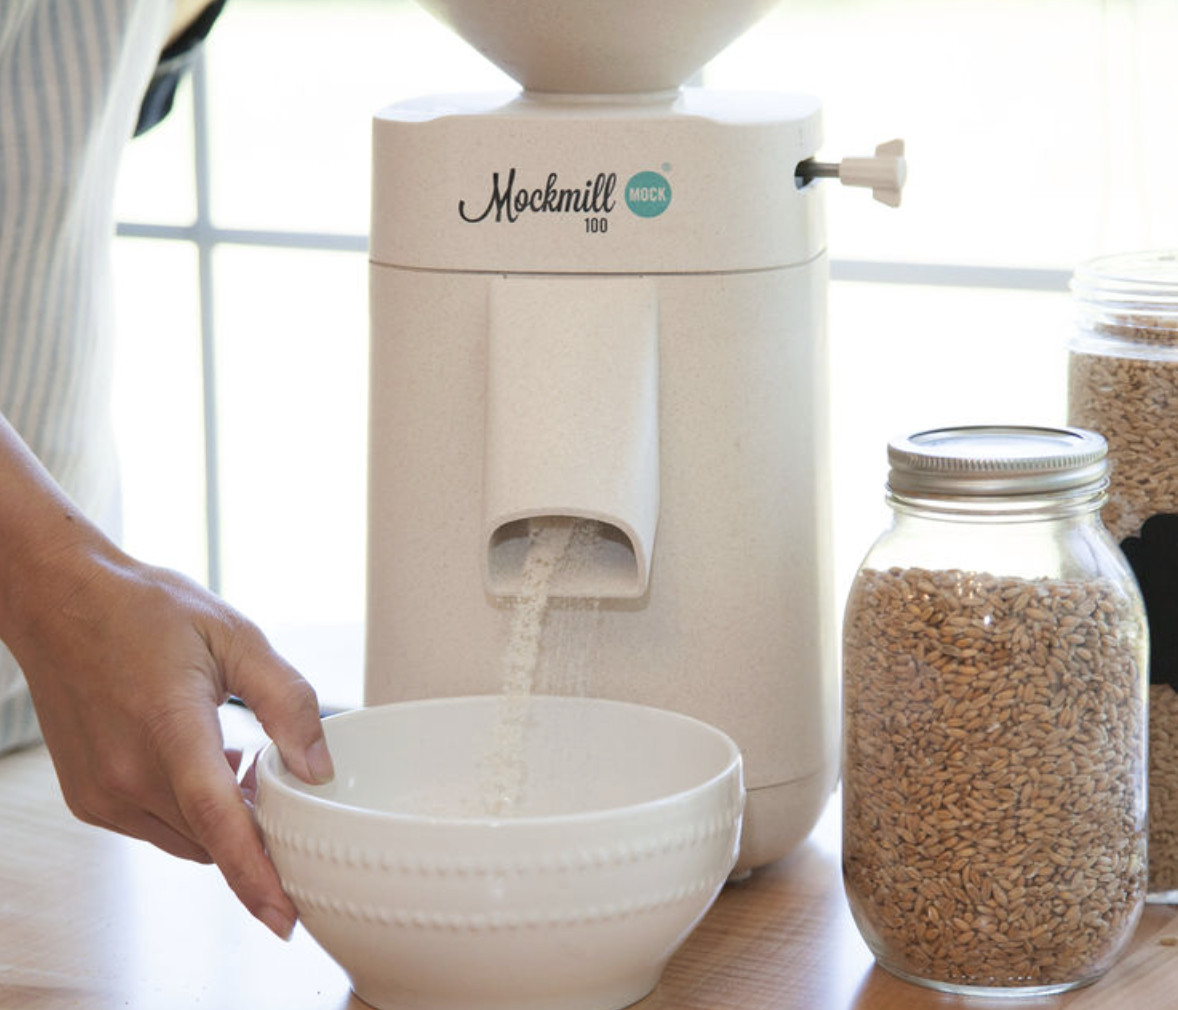
Electric mills do the work for you. With the flip of a switch, they turn whole grain berries into flour quickly and consistently and they are ideal if you plan on baking daily or make large batches.
Two popular, well-loved electric options that I researched and checked out are the NutriMill and Mockmill. Both are known for durability, reliable performance, and high-quality flour results, though they vary in capacity, speed, and price. I ended up with a Mockmill 200 and absolutely love it. It gets used daily in my kitchen and saves me so much time. It is an investment, but has definitely been worth the expense.
Choosing a Grain
Once you have selected a mill, it is time to choose a grain. I recommend starting with one grain and adding in more to your repertoire as you get comfortable. A great grain to start with is hard white wheat, as it is the most beginner-friendly and versatile and is pretty close to the commercial all purpose flour you buy at the grocery store.
Fresh flour is best used immediately, so mill only what you need. Whole grain berries store far longer than flour. I buy my grains in 25lb bags and store them in food grade five-gallon buckets with lids on a pantry shelf in my basement. Something I love about whole grains is that they can be stored for years, so you don’t have to worry about them going bad, not that any grains last very long in my house with all the baking we do.

A Grain-by-Grain Beginner Guide
Hard White Wheat: mild flavor, versatile, and beginner-friendly; great for sandwich bread, pancakes & waffles, muffins, and pizza dough
Hard Red Wheat- classic whole-wheat flavor, darker and stronger than white wheat; great for rustic breads, sourdough, and crackers; blend with hard white wheat to soften the flavor and make it more approachable for anyone used to eating store bought flour
Soft White Wheat- perfect for tender baking, low protein makes it ideal for pastries but not yeast breads; best for cookies, cakes, muffins, biscuits, and scones
Spelt- soft, extensible dough, great nutty flavor, absorbs less water than the above wheats so you may need to adjust recipe and use a little less liquid than called for; This is one of my favorite grains because of the nutty flavor it has. I love using spelt for cookies, muffins, pancakes, crepes, and tortillas. I often mix it in with other grains when baking breads.
Einkorn- ancient grain, delicate so avoid heavy kneading, best for pancakes, muffins, flatbreads, and quick breads
Khorasan/ Kamut- rich and buttery, absorbs water slowly so allow time for the dough to rest and hydrate, best for pasta, flatbreads, yeast breads, and sourdough
Durum Wheat- the pasta grain, once milled it is referred to as semolina flour, fresh milled durum is finer than store-bought semolina, I like to use a mixture of half durum/ half soft white wheat for my homemade pastas
Rye- bold and earthy, best used mixed with other grains for a 10-30% blend, great for breads and crackers, My all-time favorite way to use rye is in brown bread (so good!)
Oats- naturally gluten-free (although anyone with sensitivities should look for oats specifically labeled as gluten free because many oats are processed in the same facilities and equipment as other wheat products), great for pancakes, muffins, granola, and porridge, I also love mixing oats with hard white wheat to make a honey oat sandwich bread.
Corn- great for cornbread, grits, and corn tortilllas, usually needs to be milled in two steps (first to crack the corn and second to mill into corn meal or grits), can be nixtamalized to unlock vital nutrients like niacin (B3), improve digestibility, enhance flavor and aroma, and make it usable for traditional foods like tortillas and tamales by softening the kernels and removing the hull
Soaking and Sprouting Grains
Soaking and sprouting are traditional methods that improve the digestibility and nutrient availability of grains.
Soaking grains reduces phytic acid, softens then grain, and improves mineral absorption. One method is to soak the fresh milled flour with whatever liquid is called for in the recipe and then let it rest for 8+ hours before adding the remaining ingredients. The other method is to actually soak the whole grains. Soaked whole grains can then be cooked, dried and milled, or sprouted.
How to soak whole grains:
Cover grain berries with warm water
Optional: add a mild acid (vinegar, lemon juice, whey)
Soak 8–24 hours
Drain and rinse
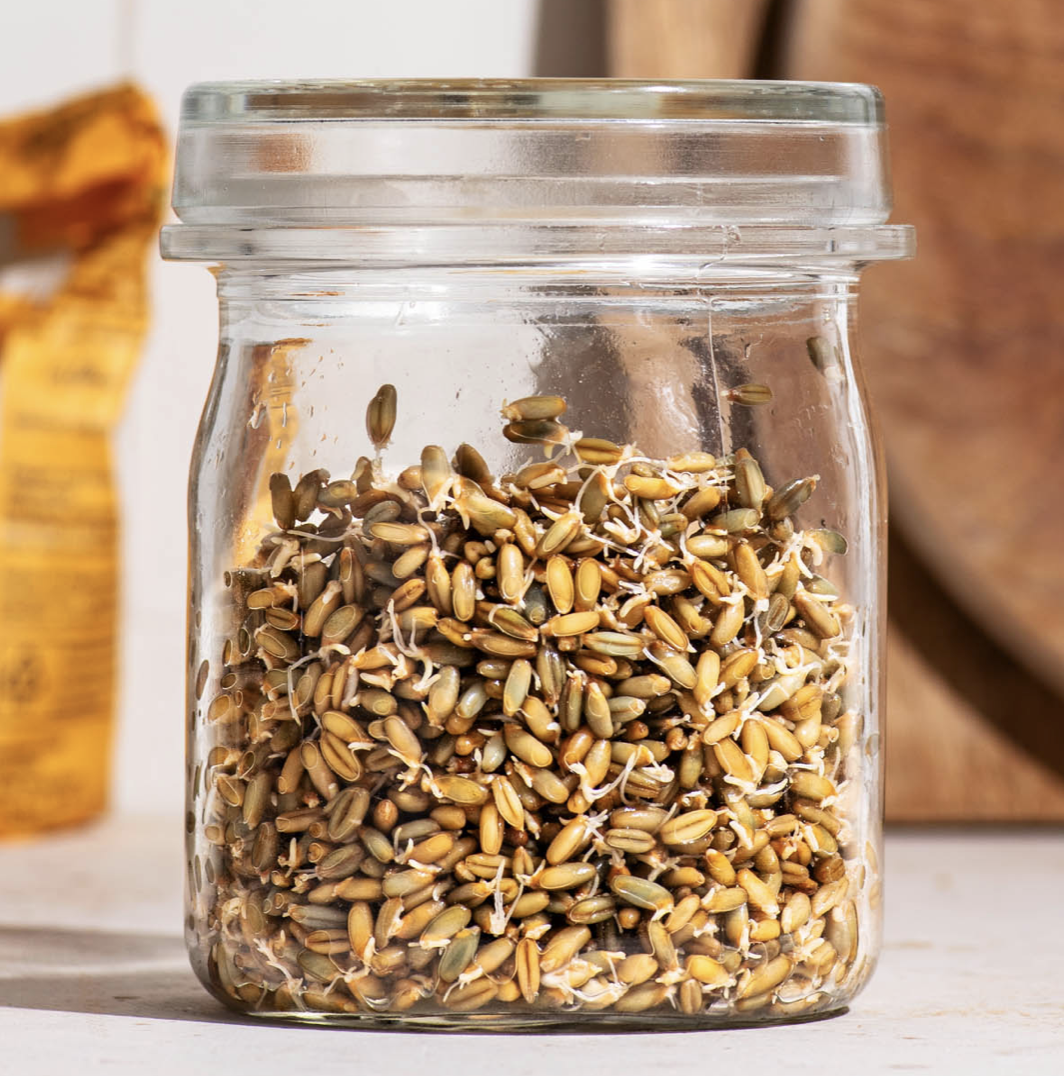
Sprouting allows the grain to begin germination. Sprouting also reduces phytic acid in the grains. It also increases enzyme activity and tends to give a slightly sweeter flavor than unsprouted grains. Sprouted grains can be dehydrated and then milled.
How to sprout whole grains:
Soak grain 8–12 hours
Drain and rinse
Rinse 2–3 times daily
Sprout 1–3 days until a small tail appears
If you plan to bake with sprouted grain flour, just keep in mind that it will absorb less liquid than grains that haven’t been soaked and sprouted, it will ferment faster which will affect sourdough fermentation times, and will create a softer dough. Just pay attention to this as you begin using sprouted grain flour.
Using Fresh Milled Grains Every Day
Once you have experienced the difference fresh milled flour makes in your kitchen, you will be hooked. Don’t make it complicated in the beginning. Start by replacing one staple recipe per week.
It is also important to create a sustainable baking rhythm. You don’t need to do everything at once. Start with making the switch and milling one basic grain like hard white wheat. Use the fresh milled flour in recipes that you are already used to baking. Then as you get more comfortable, add in other grains or other methods. Maybe soak grains or use sourdough recipes once or twice a month and save sprouted grain baking for special occasions when you may have more time. Freshly milling your own flour is already a powerful step to bringing more nutrition into your food; everything else is a bonus
Using fresh milled grains isn’t about doing more. It’s about slowing down, nourishing well, and rediscovering the beauty of simple food made with care. Start with one grain. Bake something familiar. Let your hands learn. Let your kitchen find its rhythm. That’s where the real transformation happens.